
Notice
Recent Posts
Recent Comments
Link
| 일 | 월 | 화 | 수 | 목 | 금 | 토 |
|---|---|---|---|---|---|---|
| 1 | ||||||
| 2 | 3 | 4 | 5 | 6 | 7 | 8 |
| 9 | 10 | 11 | 12 | 13 | 14 | 15 |
| 16 | 17 | 18 | 19 | 20 | 21 | 22 |
| 23 | 24 | 25 | 26 | 27 | 28 | 29 |
| 30 |
Tags
- 냅색알고리즘
- 카카오코테
- 백준10828
- 이것이자바다확인문제
- 운영체제
- 이것이자바다
- 백준온라인저지
- 컴퓨터비전
- BOJ1655
- 백준평범한배낭
- 이것이자바다9장
- 2019카카오코테
- 코딩테스트실력진단
- 백준스택
- 윤곽선검출
- 합성곱연산
- 백준
- java
- 백준괄호
- KT포트포워딩
- 코테
- 스파르타코딩클럽
- 확인문제
- 백준9012
- 코드트리
- 백준가운데를말해요
- 웹개발기초
- BOJ
- 가운데를말해요
- 딥러닝
Archives
- Today
- Total
코딩하는 락커
[Spring Boot를 이용한 RESTful Web Services 개발] 29~30강 본문
🍃 Spring/🌱 Spring Boot를 이용한 RESTful Web Service
[Spring Boot를 이용한 RESTful Web Services 개발] 29~30강
락꿈사 2022. 3. 3. 16:50Swagger 설명
- 설계, 빌드, 문서화, 사용에 관련된 작업을 지원해주는 오픈소스 프레임워크
- 사용자, 개발자에 관련된 Documentation 페이지를 만들 수 있음
REST API Documentation을 위한 Swagger 사용
- pom.xml 파일에 의존성 추가
- 원래는 주석 내용으로 추가해야하나 Spring boot 2.6버전 이후에 spring.mvc.pathmatch.matching-strategy 값이 ant_apth_matcher에서 path_pattern_parser로 변경되면서 몇몇 라이브러리(swagger포함)에 오류가 발생하는 문제로 수정. (링크 참고)
<!--        <dependency>-->
<!--            <groupId>io.springfox</groupId>-->
<!--            <artifactId>springfox-swagger2</artifactId>-->
<!--            <version>2.9.2</version>-->
<!--        </dependency>-->
<!--        <dependency>-->
<!--            <groupId>io.springfox</groupId>-->
<!--            <artifactId>springfox-swagger-ui</artifactId>-->
<!--            <version>2.9.2</version>-->
<!--        </dependency>-->
<dependency>
    <groupId>io.springfox</groupId>
    <artifactId>springfox-boot-starter</artifactId>
    <version>3.0.0</version>
</dependency>
<dependency>
    <groupId>io.springfox</groupId>
    <artifactId>springfox-swagger-ui</artifactId>
    <version>3.0.0</version>
</dependency>- application.yml파일에 추가
spring:
  messages:
    basename: messages
  mvc:
    pathmatch:
      matching-strategy: ant_path_matcher
- config 패키지 생성 -> SwaggerConfig 클래스 생성
- 스프링 빈 프로젝트에서 Configuration과 같이 특별한 용도를 가지고 있는 빈으로 등록하고 싶은 경우 Class 선언 상단에 필요한 어노테이션을 추가해야 함
- @Configuration 어노테이션 추가하여 설정에 해당 빈 올리기, @EnableSwagger2 어노테이션 추가하여 swagger 용도로 사용하는 것 설정
package com.example.restfulwebservice.config;

import org.springframework.context.annotation.Bean;
import org.springframework.context.annotation.Configuration;
import springfox.documentation.spi.DocumentationType;
import springfox.documentation.spring.web.plugins.Docket;
import springfox.documentation.swagger2.annotations.EnableSwagger2;

@Configuration
@EnableSwagger2
public class SwaggerConfig {

    // api와 관련된 Documentation을 만들기 때문에 메소드 명을 api로 설정
    // Docket 형으로 반환하여 가지고 있는 문서의 내용을 Documentaion화 해줌
    @Bean
    public Docket api(){
        return new Docket(DocumentationType.SWAGGER_2);
    }
}


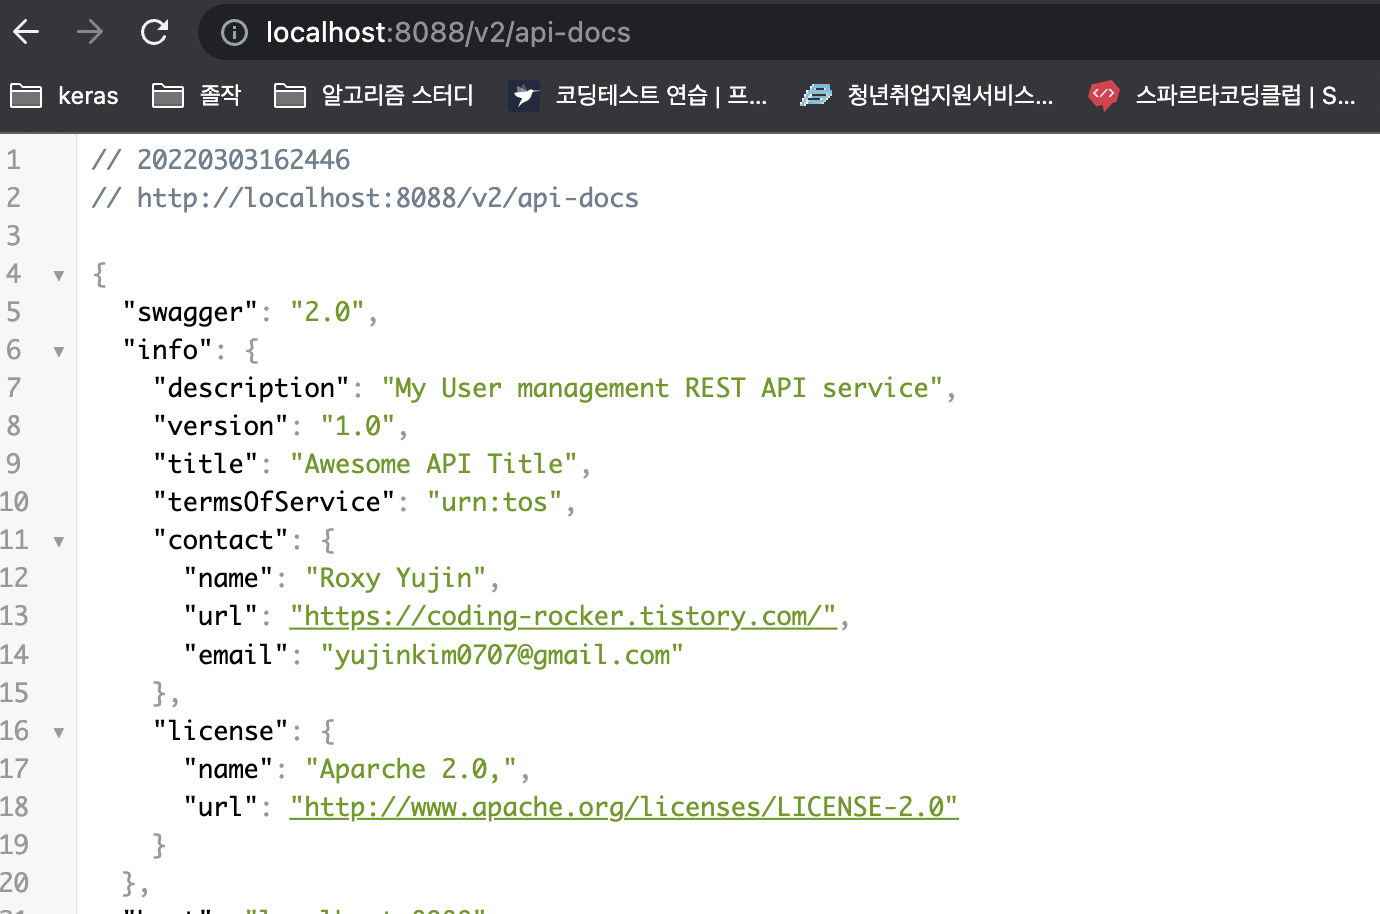
- Swagger ui 페이지는 개발 회사나 일반 사용자들이 커스터마이징 해서 사용할 수 있도록 지원해주는 도구.
- v2/api-docs 페이지에서 전달되어진 값을 토대로 ui 페이지를 직접 커스터마이징 해서 작성할 수 있음
Swagger Documentation 구현 방법
- Swagger Documentation에 API 정보, 프로듀서 정보, 컨슈머 정보 등을 추가하여 커스터마이징 하기
- SwaggerConfig 클래스 수정
package com.example.restfulwebservice.user;

import com.fasterxml.jackson.annotation.JsonFilter;
import com.fasterxml.jackson.annotation.JsonIgnore;
import com.fasterxml.jackson.annotation.JsonIgnoreProperties;
import io.swagger.annotations.ApiModel;
import io.swagger.annotations.ApiModelProperty;
import lombok.AllArgsConstructor;
import lombok.Data;
import lombok.NoArgsConstructor;

import javax.validation.constraints.Past;
import javax.validation.constraints.Size;
import java.util.Date;

@Data
@AllArgsConstructor
@NoArgsConstructor
@ApiModel(description = "사용자 상제 정보를 위한 도메인 객체")
public class User {
    private Integer id;
    @Size(min=2, message = "Name은 2글자 이상 입력해주세요.")
    @ApiModelProperty(notes = "사용자 이름을 입력해 주세요")
    private String name;
    @Past
    @ApiModelProperty(notes = "사용자 등록일을 입력해 주세요")
    private Date joinDate;
    @ApiModelProperty(notes = "사용자 패스워드를 입력해 주세요")
    private String password;
    @ApiModelProperty(notes = "사용자 주민번호를 입력해 주세요")
    private String ssn;
}
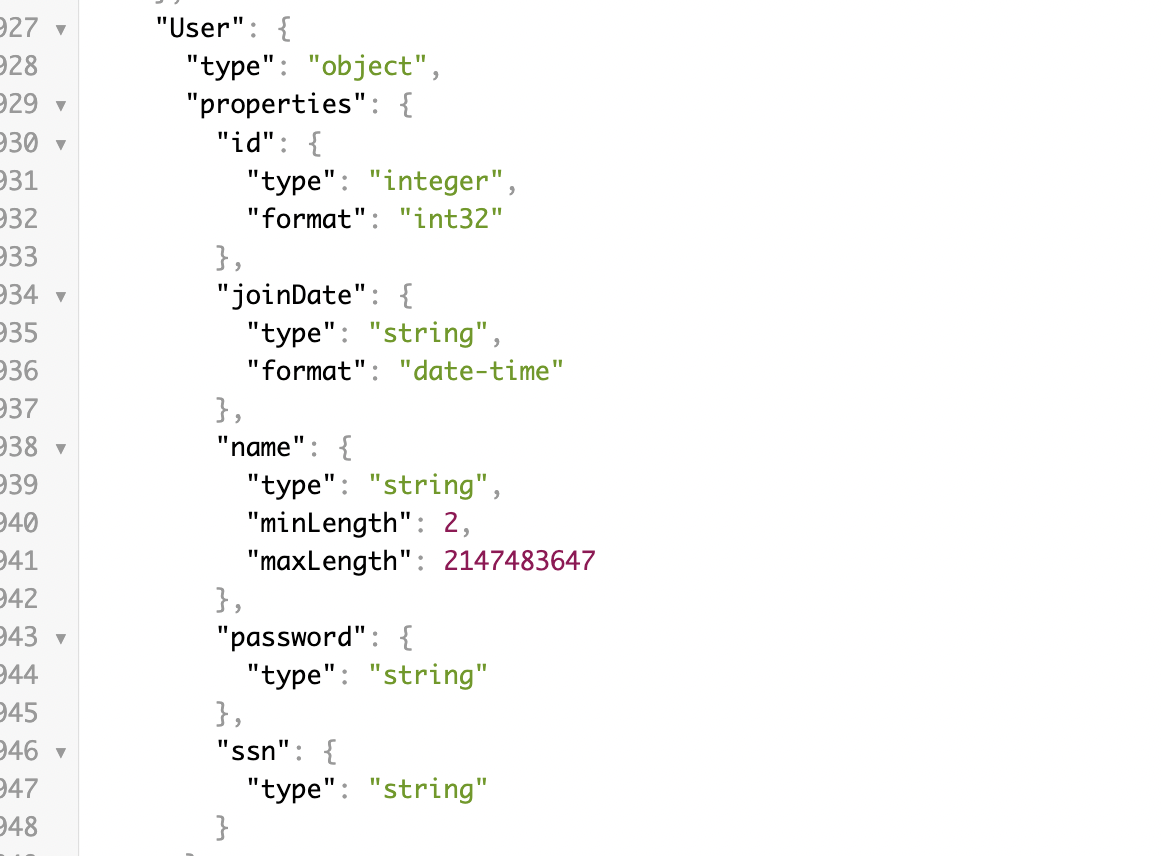
도메인 객체에 Description 추가
- User 도메인 객체에 대한 Title과 Description 정보 추가
- User 클래스 수정
package com.example.restfulwebservice.user;

import com.fasterxml.jackson.annotation.JsonFilter;
import com.fasterxml.jackson.annotation.JsonIgnore;
import com.fasterxml.jackson.annotation.JsonIgnoreProperties;
import io.swagger.annotations.ApiModel;
import io.swagger.annotations.ApiModelProperty;
import lombok.AllArgsConstructor;
import lombok.Data;
import lombok.NoArgsConstructor;

import javax.validation.constraints.Past;
import javax.validation.constraints.Size;
import java.util.Date;

@Data
@AllArgsConstructor
@NoArgsConstructor
@ApiModel(description = "사용자 상제 정보를 위한 도메인 객체")
public class User {
    private Integer id;
    @Size(min=2, message = "Name은 2글자 이상 입력해주세요.")
    @ApiModelProperty(notes = "사용자 이름을 입력해 주세요")
    private String name;
    @Past
    @ApiModelProperty(notes = "사용자 등록일을 입력해 주세요")
    private Date joinDate;
    @ApiModelProperty(notes = "사용자 패스워드를 입력해 주세요")
    private String password;
    @ApiModelProperty(notes = "사용자 주민번호를 입력해 주세요")
    private String ssn;
}

'🍃 Spring > 🌱 Spring Boot를 이용한 RESTful Web Service' 카테고리의 다른 글
| [Spring Boot를 이용한 RESTful Web Services 개발] 32강 (0) | 2022.03.05 |
|---|---|
| [Spring Boot를 이용한 RESTful Web Services 개발] 31강 (0) | 2022.03.03 |
| [Spring Boot를 이용한 RESTful Web Services 개발] 27~28강 (0) | 2022.02.11 |
| [Spring Boot를 이용한 RESTful Web Services 개발] 25~26강 (0) | 2022.02.09 |
| [Spring Boot를 이용한 RESTful Web Services 개발] 22~24강 (0) | 2022.02.09 |
'🍃 Spring/🌱 Spring Boot를 이용한 RESTful Web Service' Related Articles
more


Comments